
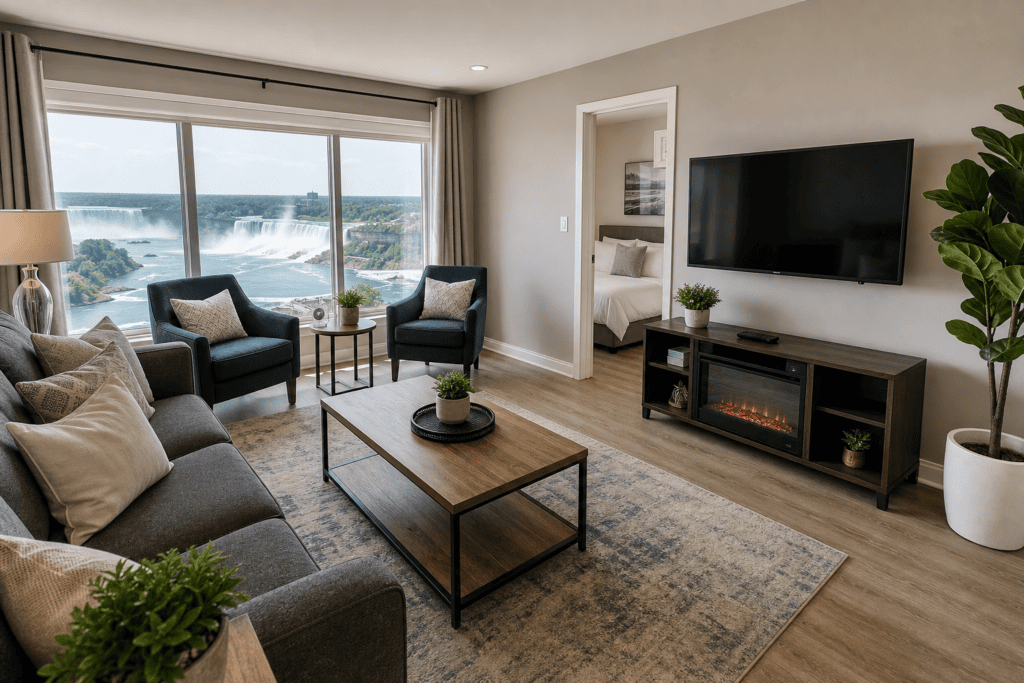
Listing photography for a Niagara Falls rental should do more than look attractive. It should help prospective guests understand the actual accommodation, including its rooms, layout, amenities, outdoor areas, and limitations, before they book.
That makes rental photography different from general Niagara Falls travel photography. A scenic waterfall image may be beautiful, but it cannot show whether the kitchen is equipped, how the bedrooms are arranged, or what guests will see when they arrive. Use the seven priorities below to create a gallery that is polished, informative, and accurate.
Quick summary

- Prepare the property, complete visible maintenance, and remove unnecessary clutter before shooting.
- Use a genuine property image as the hero photo, not a scenic image that does not represent the accommodation.
- Show every important room, feature, access point, and relevant outdoor area clearly.
- Use consistent light and framing without distorting room size or condition.
- Review the gallery and captions against the current property before publishing.
1. Prepare the property before taking photos
A camera records the property’s condition and presentation on the day of the shoot. It cannot compensate for cluttered surfaces, poorly made beds, dusty fixtures, damaged finishes, or an outdoor area that has not been maintained.
Start with a room-by-room preparation check. Remove personal belongings and unnecessary objects, but leave useful amenities visible when they help guests understand the space. Make beds neatly, present bathrooms cleanly, arrange seating naturally, and make sure the kitchen is tidy without making it look artificially unused.
Pre-shoot checklist
- Complete housekeeping and turnover cleaning.
- Remove clutter, bins, loose cables, and personal items.
- Check visible lights, lamps, appliances, and amenities.
- Resolve or document noticeable maintenance issues.
- Prepare patios, balconies, yards, entrances, and parking areas when relevant.
- Open suitable blinds or curtains and clean visible windows and mirrors.
If a repair cannot be completed before the shoot, decide whether the affected feature should be photographed and described accurately. Delaying the shoot may be wiser than publishing images that suggest a condition guests will not experience.
2. Choose an accurate hero image

The first image should represent the rental itself and give viewers a useful reason to continue through the gallery. Depending on the property, that might be a bright living area, distinctive exterior, well-presented bedroom, or genuine view available from the accommodation.
Choose the strongest truthful image, not the most dramatic image available. A heavily edited room, unusual angle that hides important features, or scenic Niagara Falls photograph that is not part of the rental can create expectations the property cannot meet.
Do not use a waterfall or landmark image as the primary image unless the listing clearly identifies it as contextual content. Guests need to recognize what they are booking at a glance.
3. Photograph every important room and feature
A complete gallery answers questions a guest would otherwise need to ask. Include the living space, kitchen, each sleeping area, bathrooms, entrances, and outdoor or access features that affect the stay.
Show notable amenities when they are included, such as a dining area, workspace, laundry facilities, parking, patio, balcony, yard, accessible entrance, or distinctive sleeping arrangement. Only show features available to guests and describe them consistently in the listing text.
Do not hide practical areas because they seem less photogenic. A clear image of a compact bathroom, narrow staircase, or shared entrance may be more useful than another similar living-room photograph.
Think in guest questions
- Where will each person sleep?
- How many bathrooms are available?
- Where can guests cook, eat, work, or relax?
- How do guests enter and move through the property?
- Which outdoor spaces and amenities are private, shared, or unavailable?
4. Make scale and layout easy to understand
Attractive photos are not enough if guests cannot understand how rooms connect. Use wider views where appropriate, and include more than one angle when a single image does not explain a room or its relationship to adjoining spaces.
Show meaningful transitions such as the route from an entrance to the living area, stairs leading to bedrooms, or the relationship between a kitchen and dining space. If the layout affects suitability, include it rather than relying only on written description.
Wide-angle framing needs restraint. It can show a small room in context, but an extreme angle may make it appear larger than it is. Keep vertical lines controlled, avoid exaggerated distortion, and compare the image with the real space before publishing.
5. Use consistent lighting and framing
Good rental photography should make spaces easy to see. Use available natural light where it improves clarity, turn on suitable interior lights, and watch for glare in mirrors, windows, glossy surfaces, and television screens.
Keep the visual treatment consistent from room to room. Similar camera height, restrained editing, and comparable brightness make it easier to understand the property as a whole. Avoid filters or color changes that make finishes, furnishings, or views look materially different from reality.
Check the edges of each frame for cropped furniture, open toilet seats, reflections, cleaning supplies, and distracting objects. A final inspection on a larger screen can reveal issues that are easy to miss on a camera display.
6. Add honest outdoor and Niagara Falls context
Outdoor images can explain what guests will actually experience at the property. Photograph an included patio, balcony, yard, entrance, parking area, or exterior when it helps guests understand access and use.
Location context can also be useful, but it must be labeled honestly. Do not imply that a property has a Niagara Falls view, direct landmark access, or a particular distance from an attraction unless that detail has been verified for the specific property.
If you include a scenic Niagara Falls photograph, identify it as a location image rather than presenting it as part of the accommodation. It should supplement the property gallery, not replace photos of the rooms and features guests are paying to use.
Captions should clarify ownership and access. Distinguish between a private balcony, shared outdoor area, nearby public attraction, and view visible only from a particular position.
7. Sequence, caption, and review the listing photos
Arrange the gallery logically. Start with the accurate hero image, then move through main living areas, sleeping spaces, bathrooms, kitchen, outdoor features, access points, and useful details.
Use captions to explain features that may not be obvious. Identify room purpose, sleeping arrangements, shared areas, access details, or limitations when those details affect a guest’s decision.
Before publishing, compare every image with the current property and written listing. Remove outdated furnishings, unavailable amenities, and images that no longer show the actual condition. Listing presentation is part of broader Airbnb hosting and co-hosting support, alongside guest communication, housekeeping, and short-term rental operations.
When should you photograph the rental yourself or hire help?
Self-photography can be practical when the property is straightforward, well prepared, and easy to document accurately. It works best when you have time to photograph every important space, review the images critically, and update the gallery when the property changes.
Professional help may be useful when the property is large, has a complex layout, includes several outdoor areas, or needs a consistent presentation across multiple listings. A property manager may also coordinate housekeeping, maintenance, photography preparation, and listing presentation.
Frequently asked questions
Is professional photography necessary for a Niagara Falls rental?
No automatic requirement makes professional photography necessary for every rental. An owner can create a useful gallery with careful preparation, clear framing, and honest coverage. Professional help is more valuable when the property is complex or difficult to prepare.
How many photos should a rental listing include?
There is no useful fixed number for every property. Include enough images for guests to evaluate every important room, feature, access point, and relevant limitation without filling the gallery with repetitive frames.
Should Niagara Falls photos appear in a rental listing?
They may appear as clearly identified location context, but they should not replace accommodation photos or imply a Falls view, direct access, or particular proximity unless that claim is verified.
When should rental listing photos be updated?
Update them whenever furnishings, finishes, amenities, layout, outdoor areas, or property condition changes. Replace images when they no longer match what guests see on arrival.
Conclusion: Make the listing easy to trust
The strongest listing photography for a Niagara Falls rental is prepared carefully, starts with the property itself, covers every important space, explains scale and layout, uses consistent framing, and presents outdoor and location context honestly.
Photograph the property yourself when you can provide complete, current coverage. Hire help when the property or presentation is complex, or ask a property manager to coordinate preparation when you also need support with cleaning, maintenance, guest communication, or short-term rental operations.
The Home Away From Home Developments Inc. offers Niagara Falls short-term rental management, Airbnb hosting and co-hosting, housekeeping, listing support, and related property-care services. To discuss your rental, visit The Home Away From Home Developments Inc..